If you’re experiencing issues like websites not loading correctly, outdated pages, or DNS-related errors in Google Chrome, clearing the DNS cache can often resolve these problems. Google Chrome provides a built-in tool, chrome://net-internals, which allows users to manage and clear the browser’s DNS cache.
What is chrome://net-internals?
chrome://net-internals is an internal Chrome URL that opens a diagnostic tool for network-related information. It provides insights into Chrome’s networking stack, including DNS, sockets, and other network events. This tool is particularly useful for developers and advanced users to troubleshoot network issues.
Why Clear DNS Cache Using chrome://net-internals?
Clearing the DNS cache via chrome://net-internals can help in the following scenarios:
-
Website IP Changes: When a website moves to a new server, the IP address changes. The cached DNS information may point to the old IP, causing loading issues.
-
Persistent Connectivity Issues: If certain websites are inaccessible despite being online, stale DNS entries might be the culprit.
-
Incorrect Redirects: Outdated DNS cache can lead to incorrect website redirections.
-
DNS Poisoning Concerns: After malware removal, clearing DNS cache ensures that corrupted entries are purged.
-
Website Development: Developers testing DNS changes need to clear cache to see updates.
-
Network Troubleshooting: As a general step in diagnosing internet connectivity problems.
-
Privacy Considerations: Removing traces of visited websites from the browser’s cache.
Step-by-Step Guide to Clear DNS Cache Using chrome://net-internals
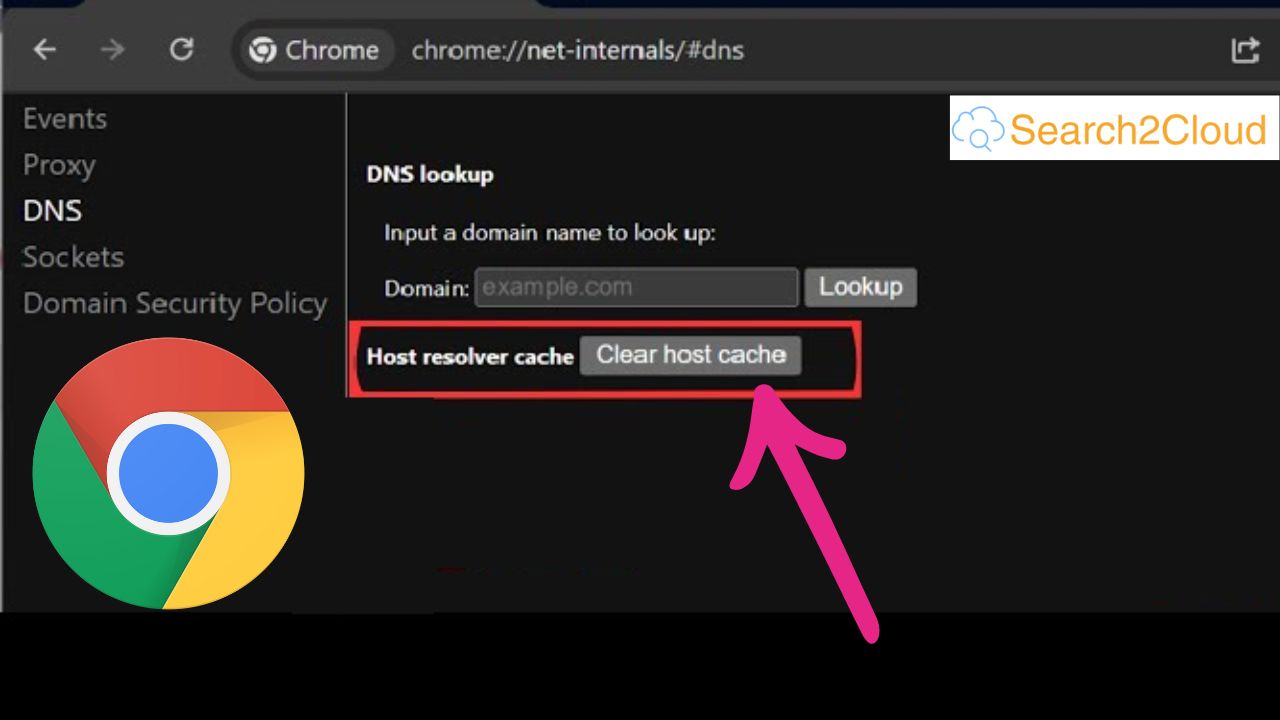
Step 1: Open chrome://net-internals/#dns
-
Launch Google Chrome.
-
In the address bar, type
chrome://net-internals/#dnsand press Enter. -
This opens the DNS section of Chrome’s Net Internals tool.
Step 2: Clear Host Cache
-
On the DNS page, locate the “Clear host cache” button.
-
Click on it to flush the DNS cache.
-
Note: Chrome does not display a confirmation message, but the cache is cleared instantly.
Step 3: Flush Socket Pools (Optional)
-
For a more thorough reset, navigate to
chrome://net-internals/#sockets. -
Click on the “Flush socket pools” button.
-
This action resets active network connections, which can help resolve persistent issues.
Verifying DNS Cache Clearance
To ensure that the DNS cache has been cleared:
-
Revisit the problematic website to check if the issue persists.
-
Use Chrome’s Developer Tools
Press
F12or right-click and select “Inspect”.-
Go to the “Network” tab.
-
Reload the page and observe the DNS resolution time.
-
-
If the website loads correctly and DNS resolution time is updated, the cache has been successfully cleared.
Alternative Methods for Clearing DNS Cache
If issues persist after using chrome://net-internals, consider the following:
-
System-Level DNS Flush:
-
Windows:
-
Open Command Prompt as Administrator.
-
Type
ipconfig /flushdnsand press Enter.
-
-
macOS:
-
Open Terminal.
-
Type
sudo killall -HUP mDNSResponderand press Enter.
-
-
Linux:
-
Open Terminal.
-
Type
sudo systemd-resolve --flush-cachesand press Enter.
-
-
-
Clear Browser Cache:
-
Go to Chrome Settings > Privacy and Security > Clear browsing data.
-
Select “Cached images and files” and click “Clear data”.
-
Conclusion
Using chrome://net-internals to clear the DNS cache in Chrome is a straightforward process that can resolve various browsing issues. Regularly flushing the DNS cache ensures that Chrome fetches the most up-to-date information, leading to a smoother and more secure browsing experience.


